
Our Investment Dominator Paid Data Service Option allows you to generate a filtered and formatted land list directly from one of the leading property data companies in the Nation and import that data directly into the system with only a few clicks.
With this integration, you will not need to filter, scrub, or manually import land records into the system!
Let’s take a dive into this step by step to understand what our Paid Data Service is and how to use it.
First, log into your Investment Dominator CRM and navigate to the ‘Land‘ tab, then click the ‘Import‘ option.
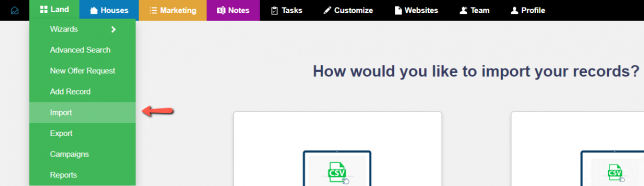
By default, the standard ‘Upload CSV File‘ option will be preselected, so for the purpose of this article go ahead and click ‘Get Data From Data Service’ option.
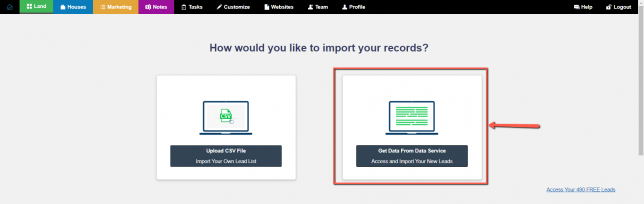
This selection will change ‘Step 2‘ of the process and look like the following:
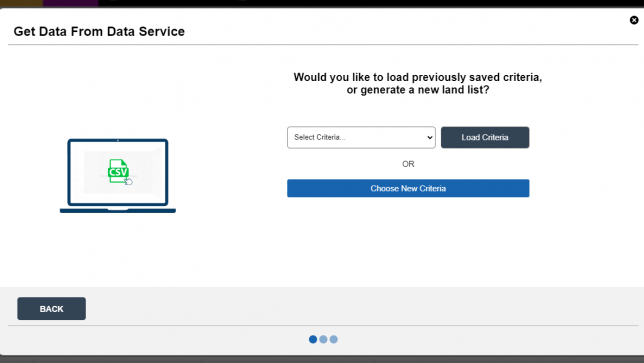
NOTE: Notice the ‘Select Criteria…’ dropdown and ‘Load Criteria’ button, these options can be used after you first define and save a list’s criteria. More information about that process can be found here.
STEP 1: Generating Your New Land List – Selecting List Criteria
To start the process, select the State you want to generate your list in.
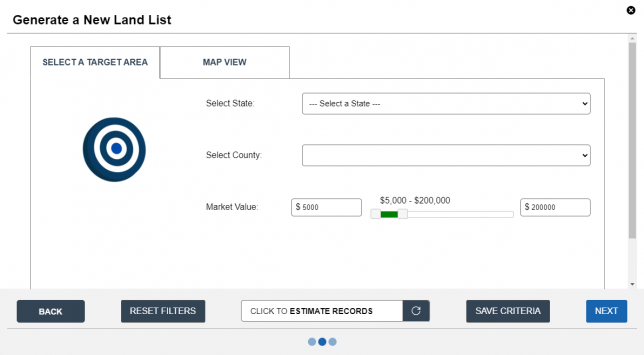
A list of Counties for that State will then load.
Select the County that you would like to focus on.
For this example, I choose to do the State of Colorado and the County of Adams. (Please note you can do whichever location you want).

You will notice how once we enter the County information we see Market Value pop up allowing us to set the range for properties we want to look for within the selected area. This can come in handy later when if we want to expand our generated list for more properties.
The ‘Est. Records’ will tell you how big your land list is and then generate your list (Skip to STEP 2 of this article), or we also have some neat ‘Advanced Filters’ which can help you adjust your list criteria further…
Advanced Filters
Click the ‘Advanced Filters‘ section to expand it.
Under this section you can adjust the ‘Property Size Range‘, allowing you to adjust your list to only contain properties within the range of acres you select.
Next is the option to Include Owners with Multiple Properties this is selected by default to ‘Yes‘ in order to provide ease of access when working through your list. If you so choose you can set this to ‘No‘, however, this means you would have to manually input the other properties of that owner to your list in the event they want you to make an offer on all of their properties that they own.
You will also see an option that can be clicked called “import only one property per owner”. This has been a much-requested feature that will limit the import to just one property per owner.
We have the option to Exclude In-state Owners which by default is set to ‘Yes‘. As well as the option to Exclude owners on “do not mail lists”, by default this is no but if you want to select yes for this option. We are trying to add the most customization to prioritize your search as much as we can.
You will notice Ownership Type in case you did not want to get any “company records”, and you can Filter by Improvement Value. Also, keep in mind when you edit more filters this will change how many records you will be able to pull from a county.
Now that we have gone over the advanced filters let’s click the button called ‘Next’ to continue.
STEP 2: Import Summary
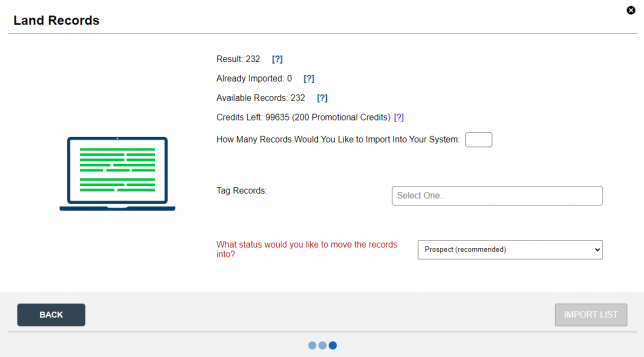
After clicking the ‘Next’ button some new options will pop up as well as information about your generated list.
First, on ‘Result’ we have how many records this Criteria has available in total.
Next, on ‘Already Imported’ we have how many records were already Imported into your System.
Next, on ‘Available Records’ we have how many records you have Available for you to Import (Total – Already Imported).
Then, on ‘Credits Left’ we have how many credit records you have available from your monthly allocation to Import, including Promotional Credits.
Next, we have the ‘How Many Records Would You Like to Import into Your System’ which is followed by a text box where you want to enter how many of these available records you want to Import. The number can’t be higher than ‘Credits Left’ or ‘Available Records’.
For example, if there are 10,000 records in a county but you only have 500 records left in your Paid Data Service monthly allotment you will need to enter in 500 to only pull 500 of the 10,000 possible records for that county. The system will then pull a random set of 500 records out of the 10,000 records and import only those into your system.
Next,, we have the ‘Tag Records’ option which allows you to add tracking or segmenting tags to all the records generated in this list. You can add as many tags as you wish.
Lastly, for the field ‘What status would you like to move the records into’ since we are importing a new list it is recommended and by default set to ‘Prospect status’.
NOTE: If you would like to save this list of criteria in the system for future reference, see this article:
After reviewing all of the options hit the ‘Import List‘ button to continue.
You will then get a notification that your list has been imported and you should notice your new records appear under the ‘Land‘ tab.