There are two ways to add your signature to a custom document.
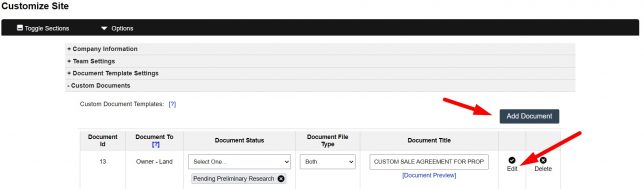
First, navigate to the ‘Customize> Custom Documents> Custom Document Templates‘ area.
Click either the ‘Add Document’ option to create a new custom document or the ‘Edit‘ option next to a custom document that you would like to edit:
Option 1: Use The [my-signature] Merge Field:
From the ‘Add‘ or ‘Edit‘ custom document screens, you can click the ‘Insert Merge Field‘ dropdown and select the ‘Your Signature‘ option to add the ‘[my-signature]‘ merge field to the ‘Document Content‘ area.
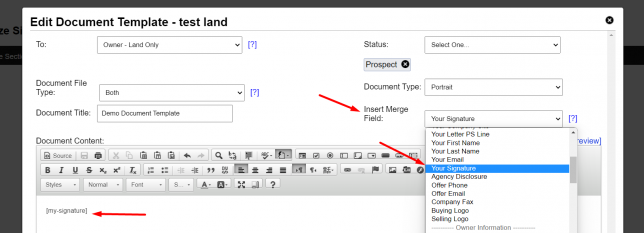
NOTE: The system will display the signature image of the user that generates the custom document.
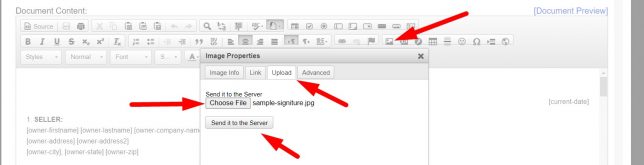
Option 2: Upload and Embed A Signature Image File:
The other way to add your signature to a custom document is to embed a signature image into the ‘Document Content’ area using the Document Editor option.
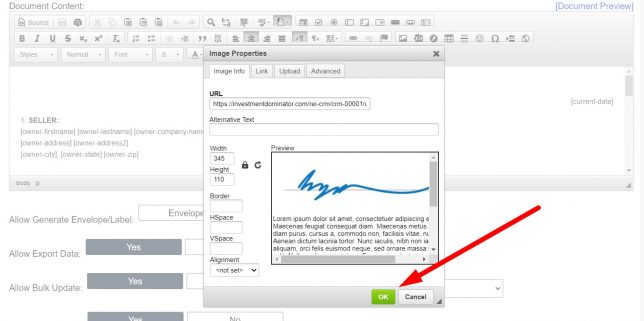
To do this simply click the Image icon from the Editor options, then navigate to the ‘Upload‘ tab and click the ‘Select File‘ option to browse to the image file on your computer and select it. Then click the ‘Send to Server‘ option to upload the file to your system:
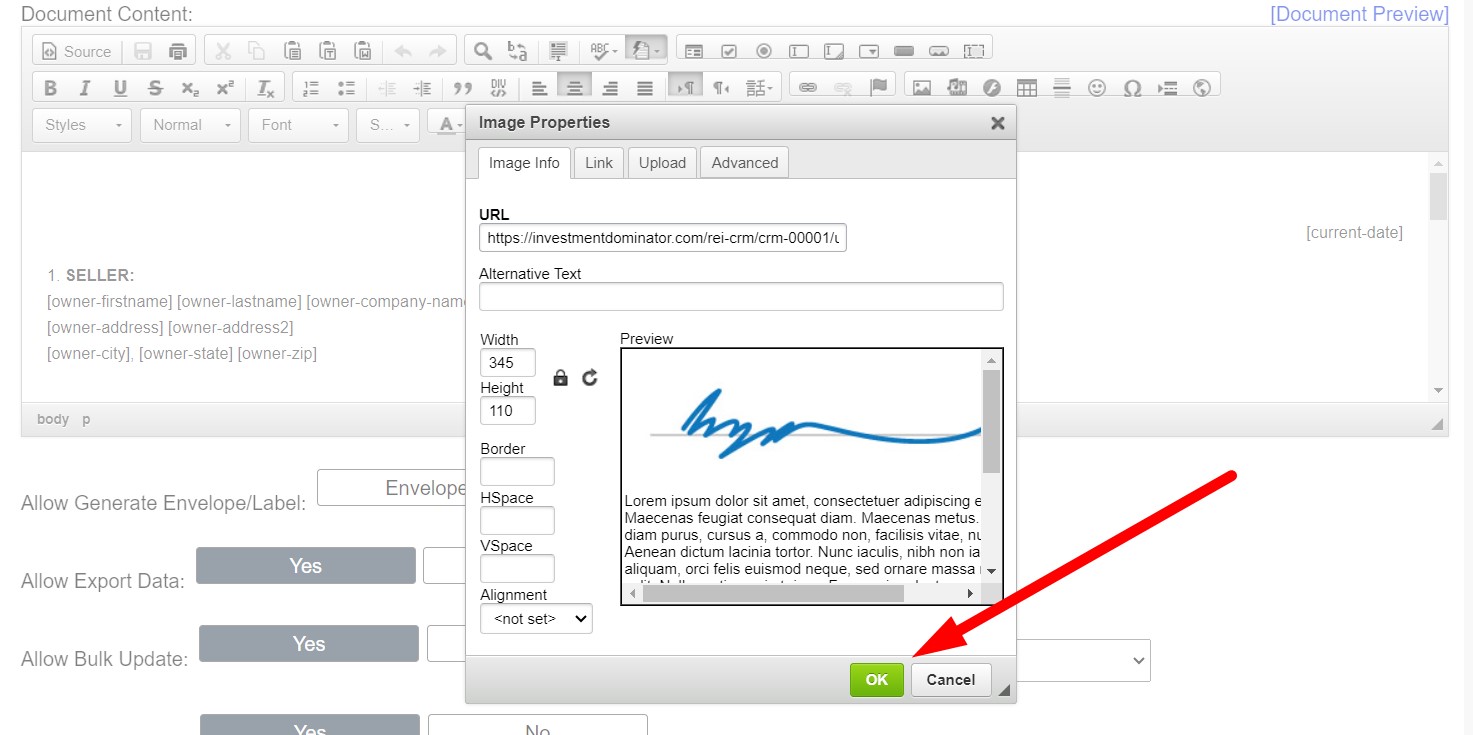
Click the green ‘OK‘ option to insert the signature image into your ‘Document Content‘ area:
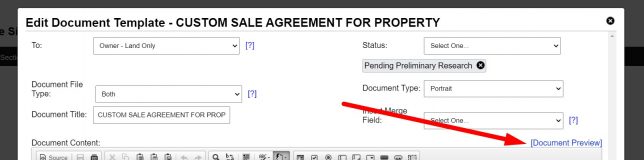
Click the ‘[Document Preview]‘ option to view your document changes:
If everything looks great, simply click the ‘Add‘ or ‘Update‘ option at the bottom of the screen to save your changes.