At this time don’t have a “Margins” option available in the system when creating a custom document, however, you can use the Table or Div option to create a container for your content and then adjust the dimensions of the Table or Div accordingly.
Standard Container Widths
You can use the standard container width of 94% (centered) to start with and then adjust the template from there.
To set a container using a Table:
- Click on the ‘Table’ icon from the WYSIWYG editor:

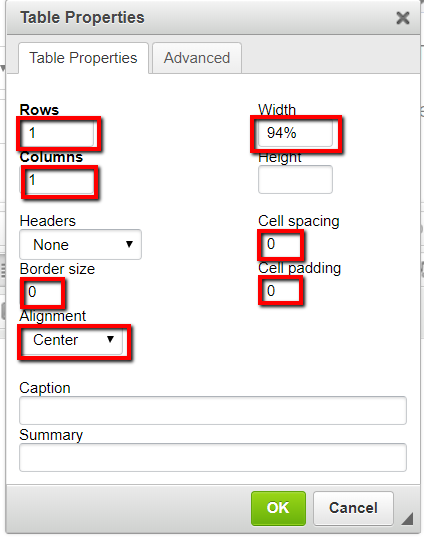
- Under the ‘Table Properties’ tab enter in the following settings…
- Rows = 1
- Columns = 1
- Border Size = 0
- Alignment = Center
- Width = 94%
- Cell spaciing = 0
- Cell padding = 0
- Click the green ‘OK’ button to insert the container Table into your document.
- Place your content inside your new container Table.
To set a container using a DIV:
- Click on the ‘Create DIV Container’ icon from the WYSIWYG editor:

- Click the ‘Advanced’ tab and under the ‘Style’ field enter in width: 94%; margin: 0px auto;
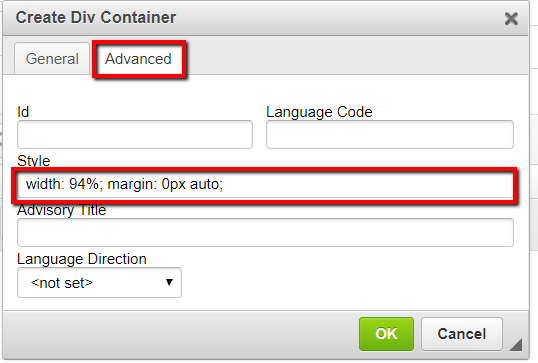
- Click the green ‘OK’ button to insert the container DIV into your document.
- Place your content inside your new container DIV.