First off, it is advisable to import only the specific records you plan to process into the Investment Dominator. However, you may have already imported several thousands of records into the Investment Dominator; but, only want to select/process a sub-set of the prospect records imported.
How do you manage a large number of prospect records imported going forward on a weekly basis?
Step 1) – Select all Prospect Land records and put them in the “ON HOLD” status
Note: Check for any other Land Records in the “HOLD” Status prior to executing this step and update/move those records into a different status.
Use the ‘Search By‘ function and select the “Prospect” status as shown below.
Press the blue ‘Search‘ button next to the field to bring up all the prospect records in your system.
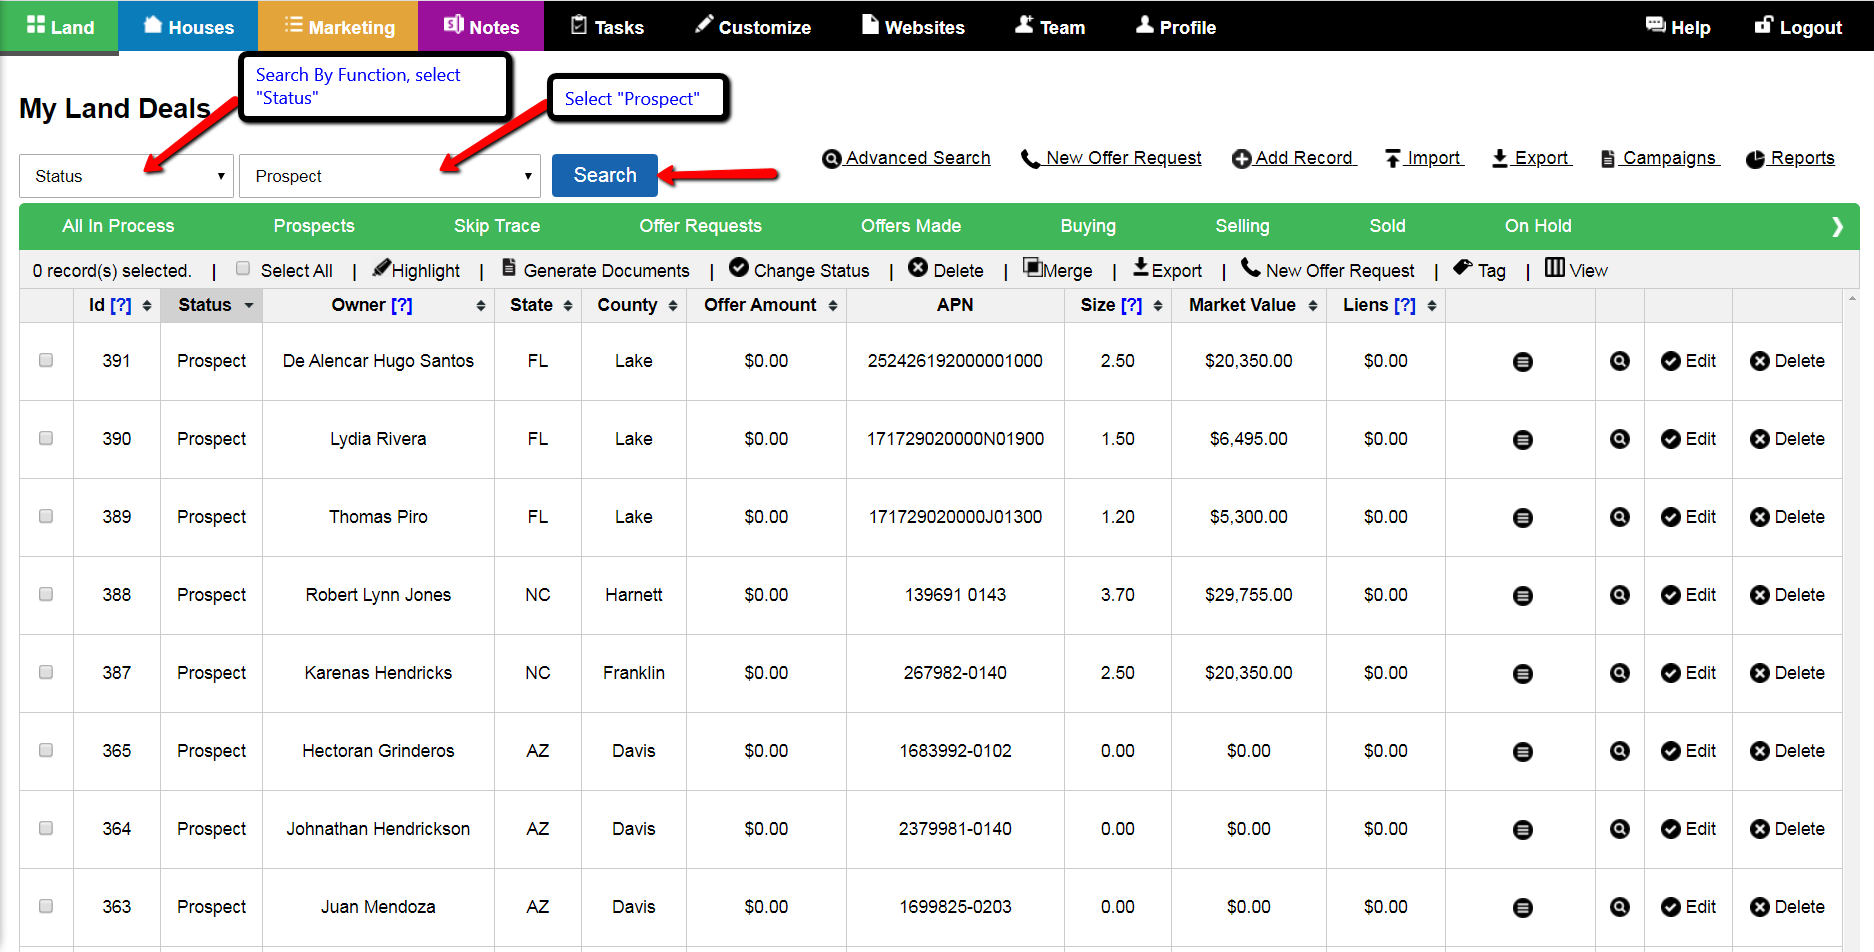
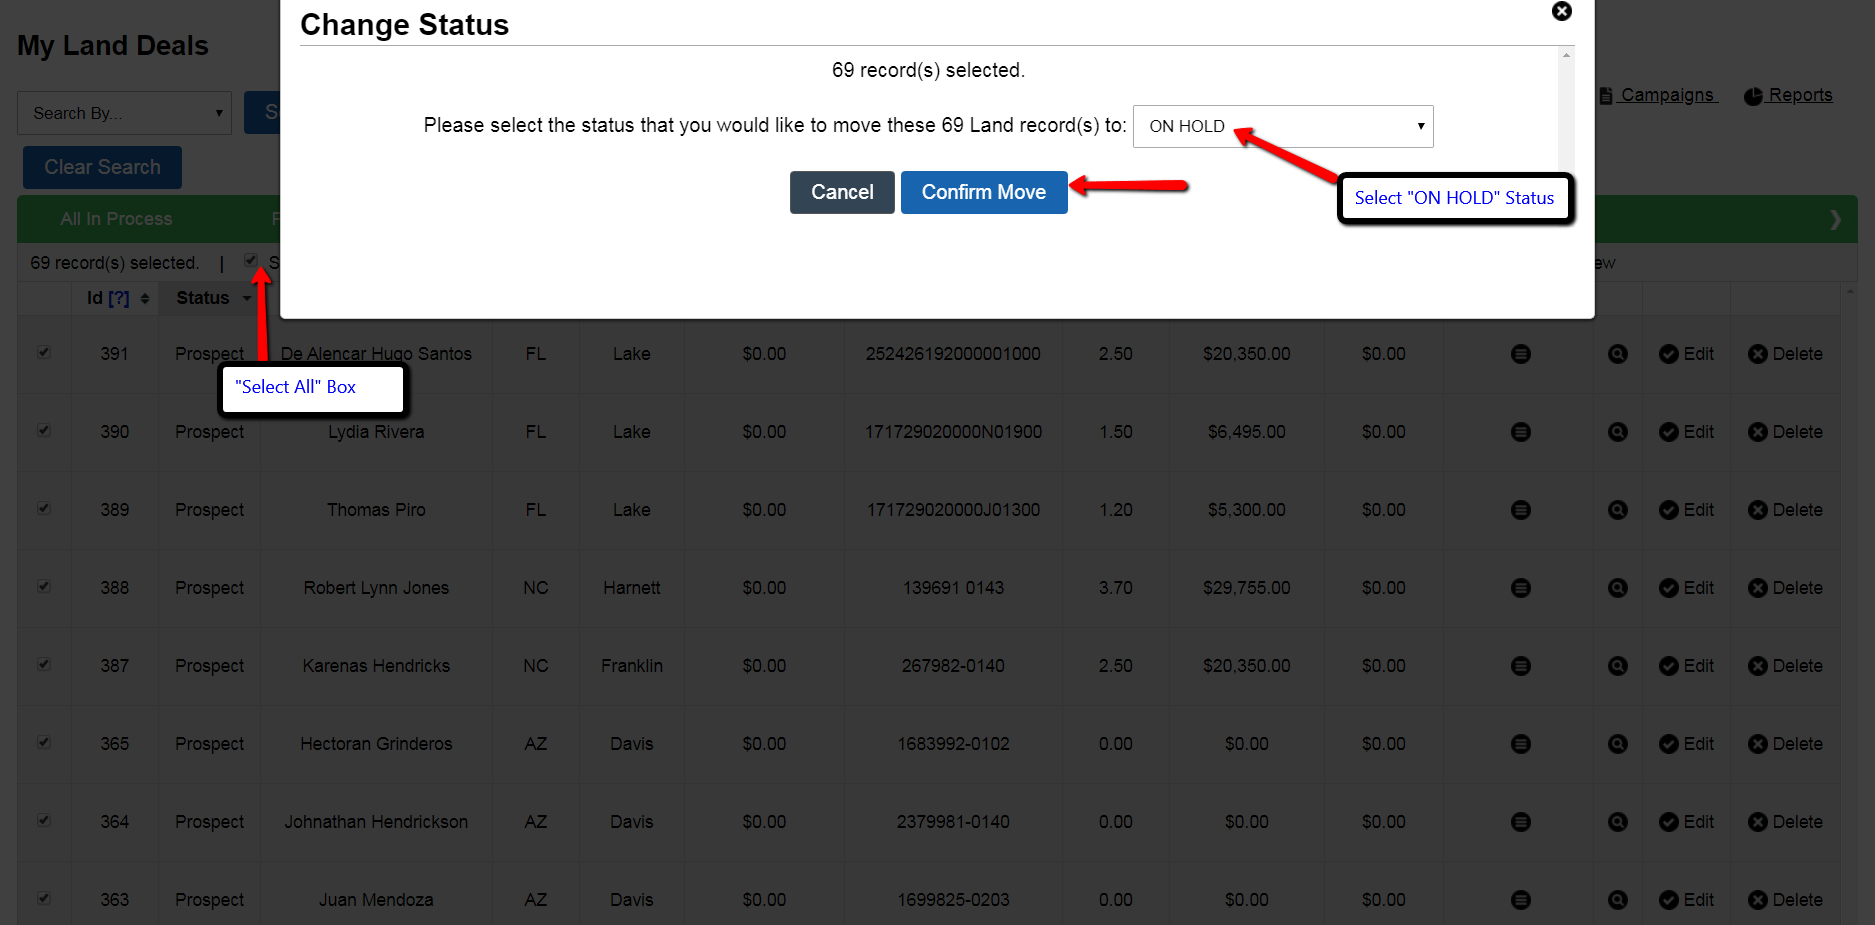
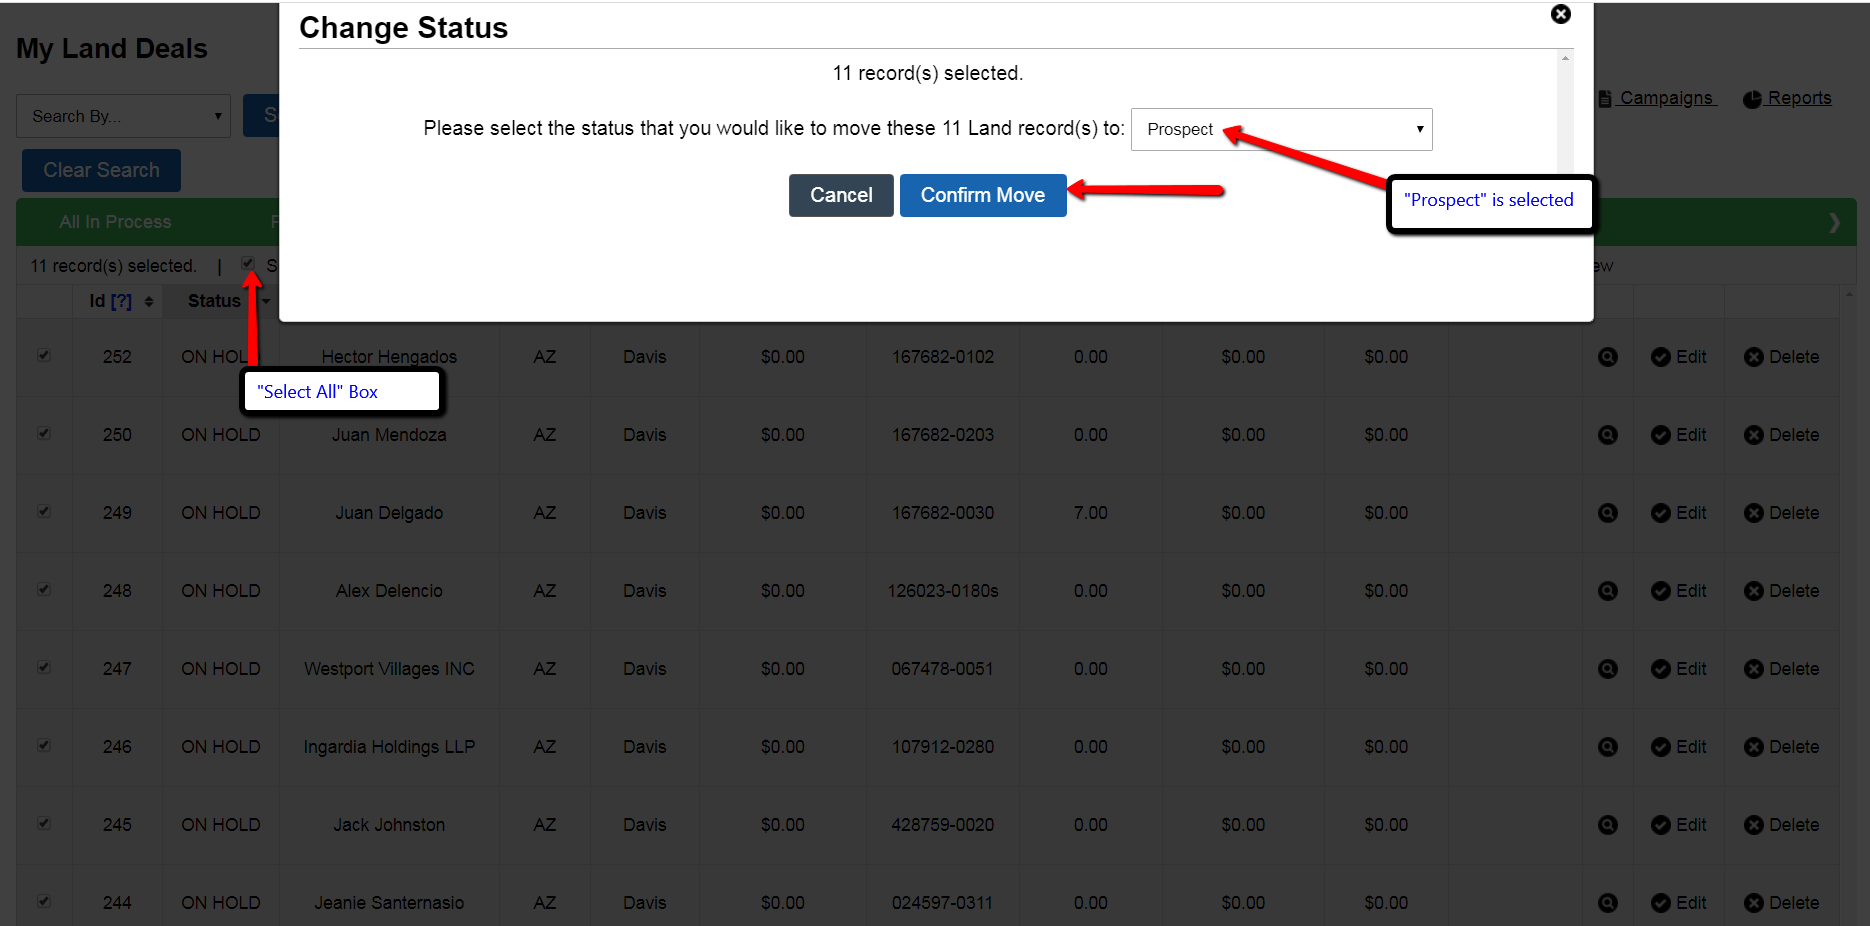
Click the ‘Select All‘ checkbox above the records to select all the records in the search query.
Select the ‘Change Status‘ option above the records.
Change the status field to the ‘ON HOLD‘ option.
And press the blue ‘Confirm Move‘ button to move these selected records from the ‘Prospect’ status to the ‘On Hold’ status.
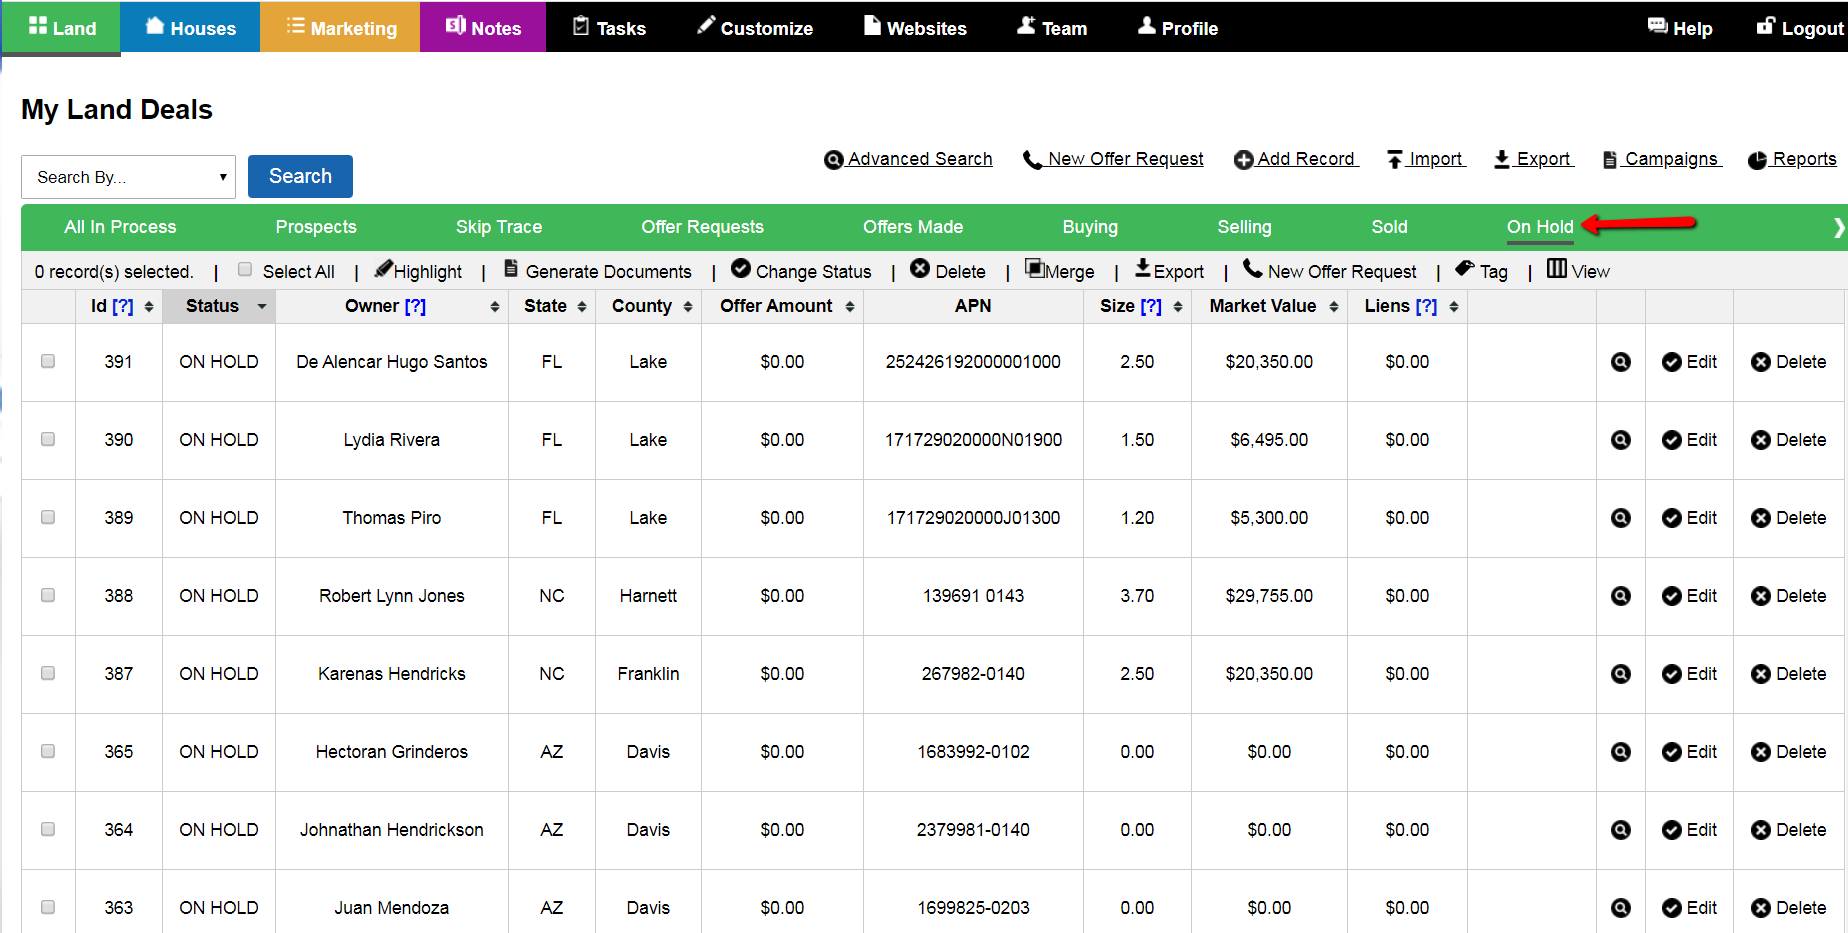
Press the blue ‘Clear Search‘ option above the record table to display all records under the ‘Land‘ page.
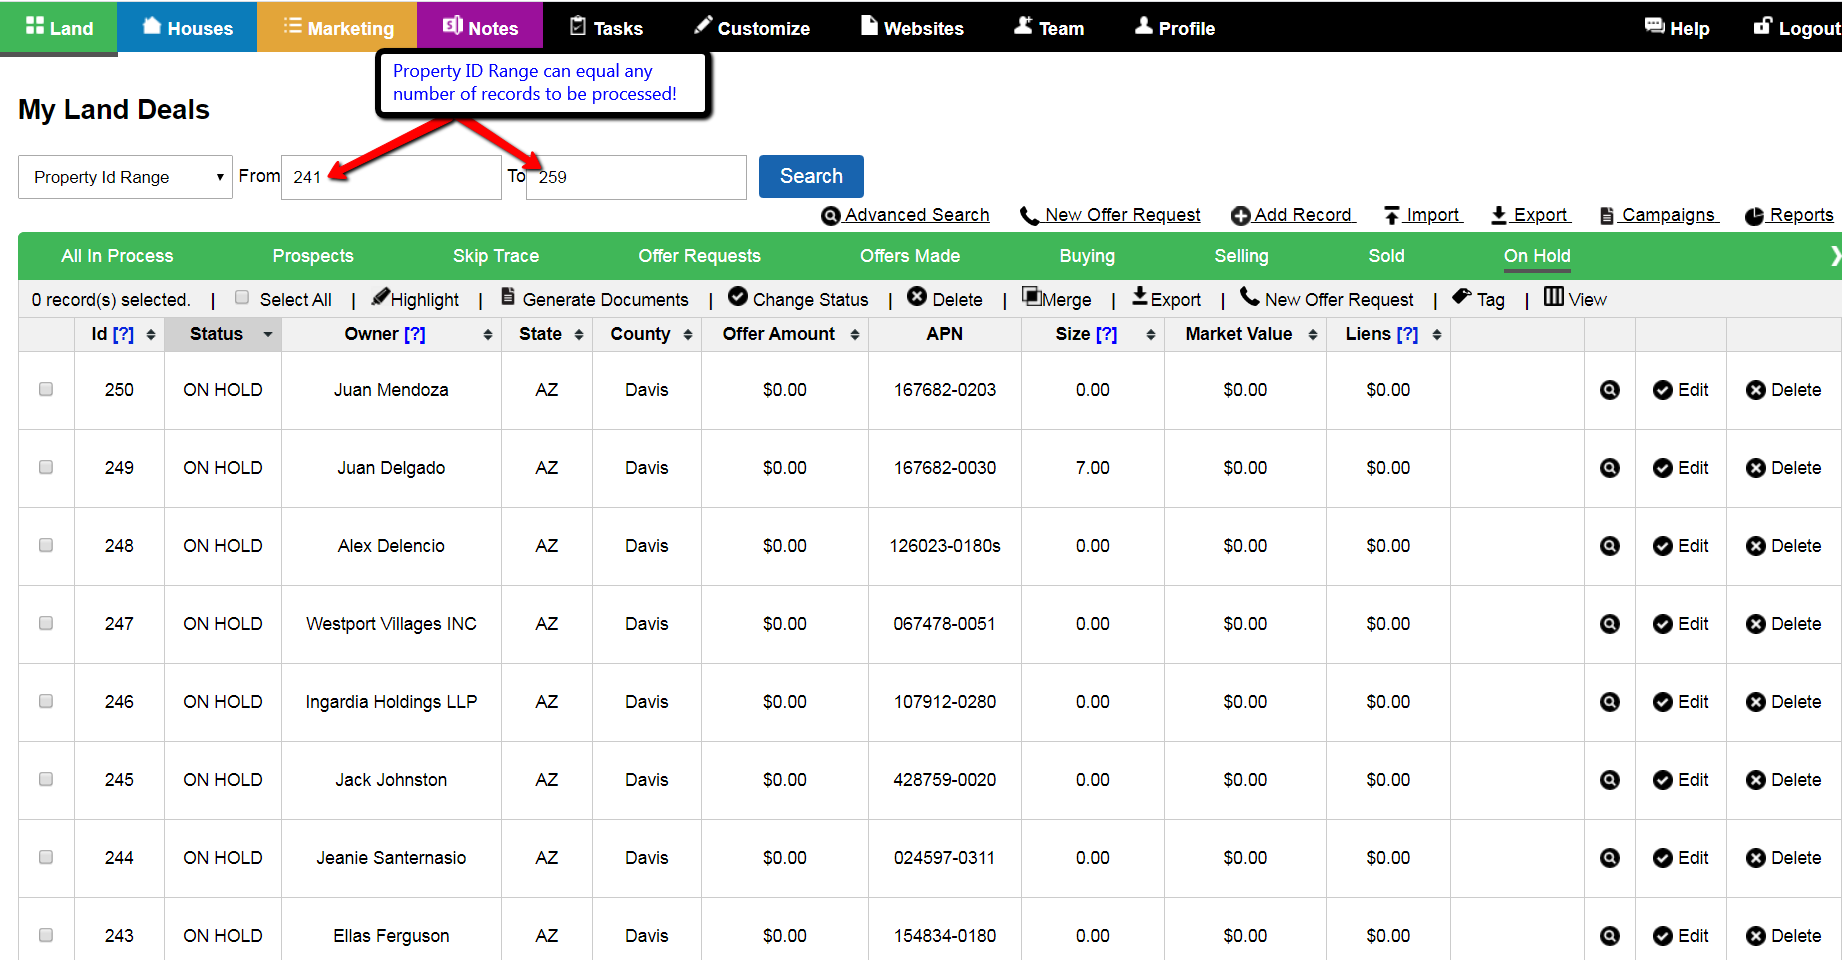
Step 2) – Select only the Prospect records by Property ID Range to be processed
NOTE: The following is only a simulation, you may select any number of records to be processed by Property ID Range as necessary.
Select/display all records “ON HOLD” status by pressing the ‘On Hold‘ Stage filter at the top of the record table as shown:
Select the ‘Search by>Property Id Range‘ option and enter the record range of records that you want to process.
Click the blue ‘Search‘ button.
NOTE: The ‘Property Id Range’ can equal 250 records, 500 records or any range of records you want to process. In this example 11 records display.
Click the ‘Select All‘ checkbox to select all the records in the search query.
Click the ‘Change Status‘ option.
The “Prospect” status should already be selected, so simply press the blue ‘Confirm Move‘ button so that these selected records move from the “ON HOLD” status to the “Prospect” status:
Step 3) – Generate your direct mail letter campaign
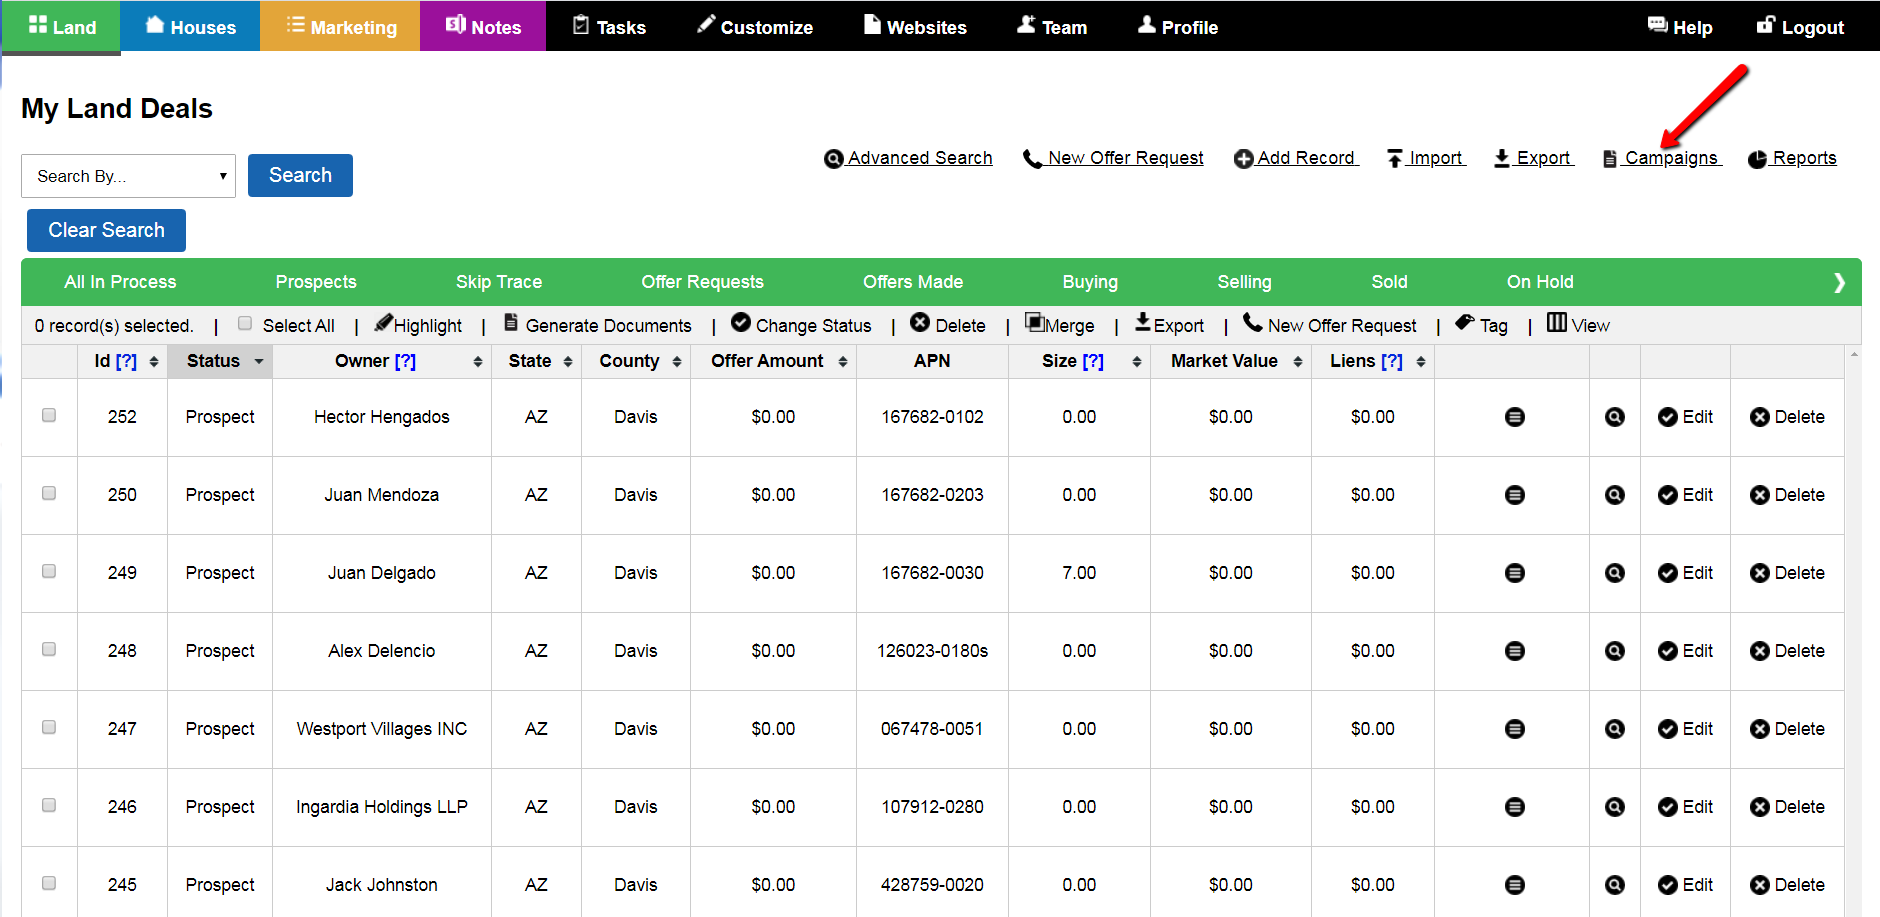
Click the ‘Campaigns‘ option above the record table:
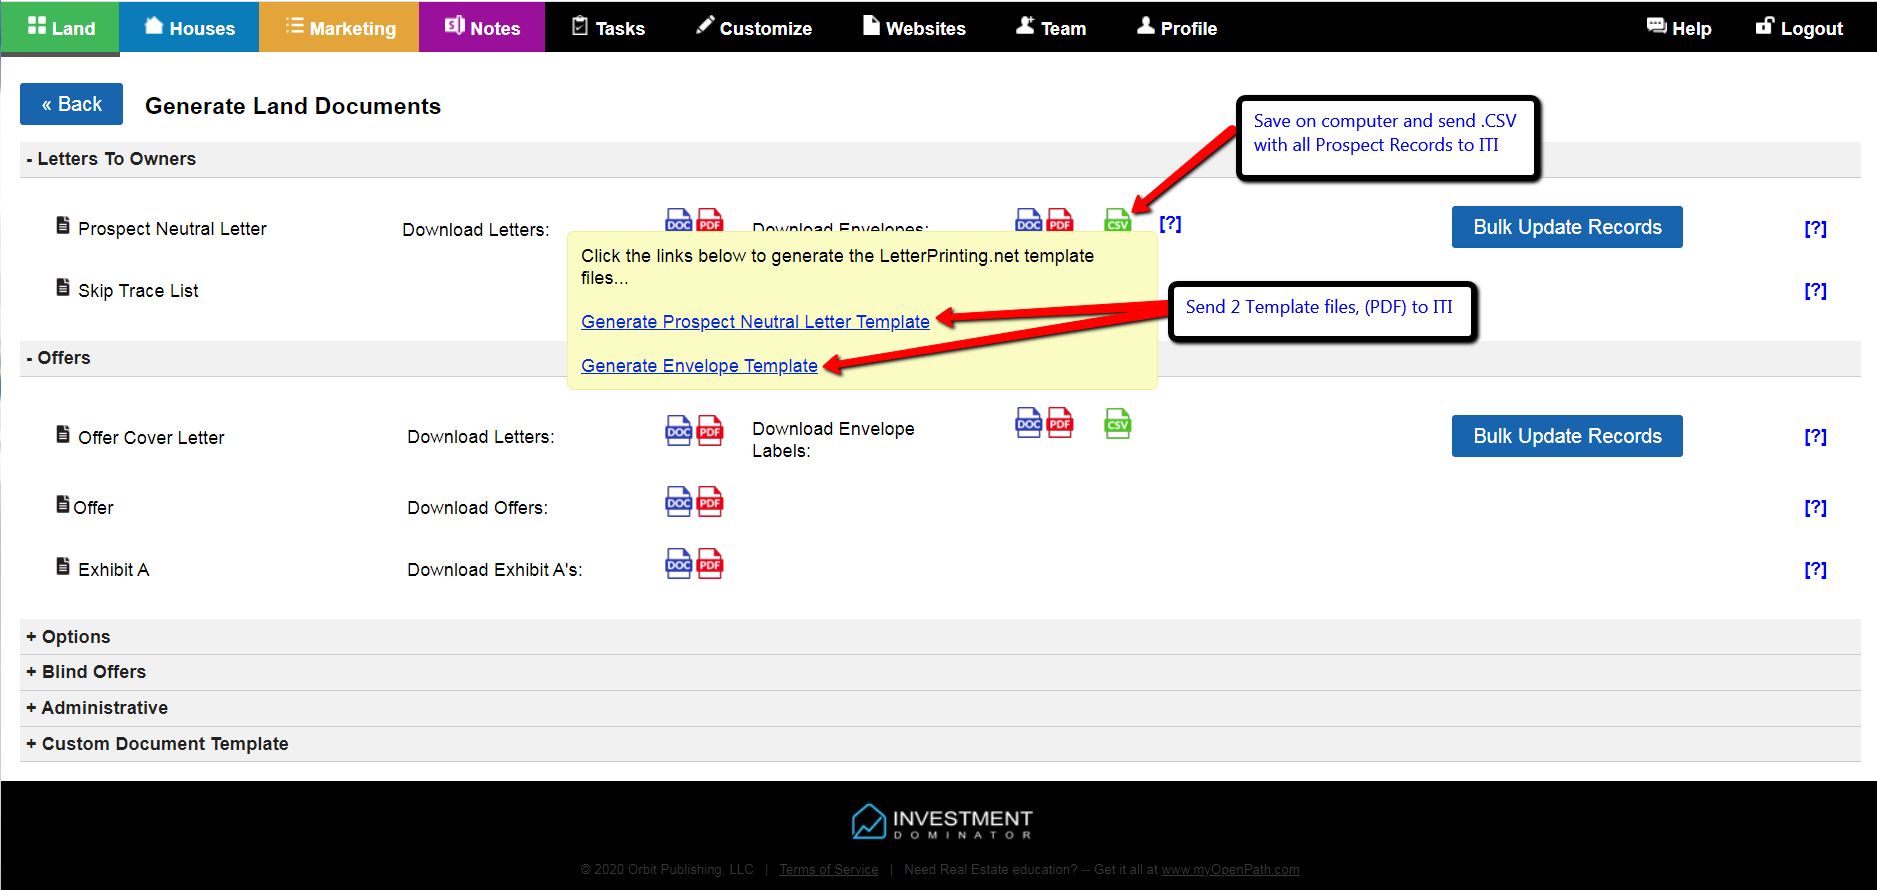
Click the green icon on the first line to save the .CSV Excel mailing list file, (containing all Prospect records included in that mailing) to your computer and send the .CSV file and two accompanying template files, (Neutral Letter and Envelope template) files to LPGLetters.com for them to process.
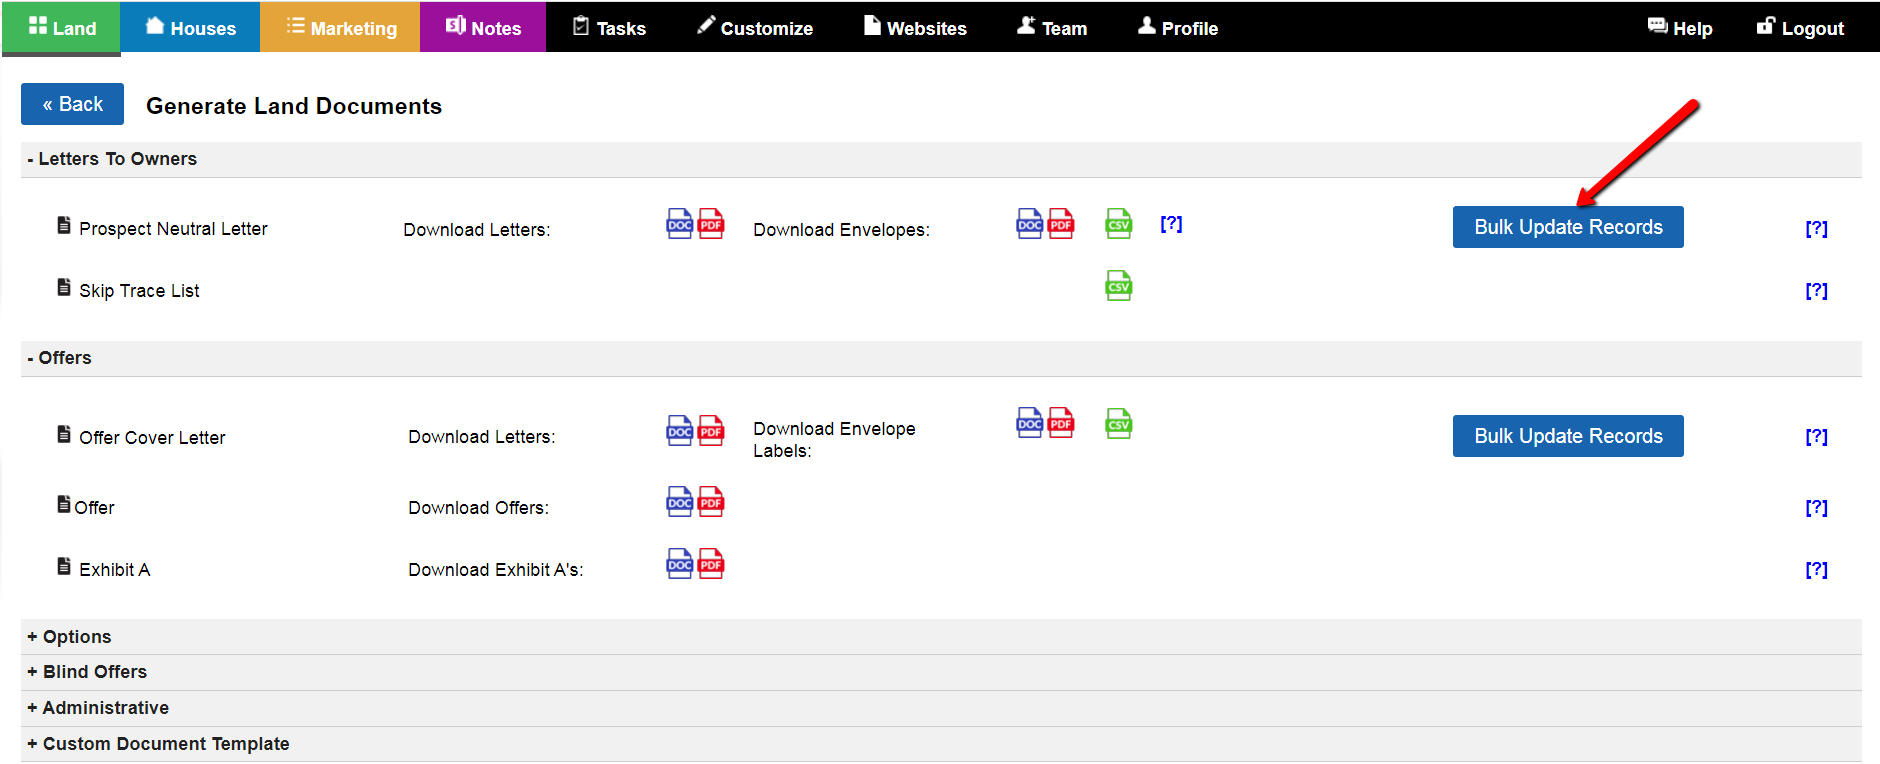
Step 4) – Use the ‘Bulk Update Records’ option to change the status of processed records for tracking
Click the ‘Bulk Update Records‘ function to change status of the records mailed from ‘Prospect’ to the ‘Mailed Letter-1’ status:
NOTE: The following week in order to process the next set of 250 or 500 records simply repeat the process above starting at Step 2) .