In the digital era, having a well-crafted Terms and Conditions page on your website is more than a legal requirement; it’s vital for your online credibility and security. This page sets clear rules, responsibilities, and expectations for your website visitors, helping you avoid legal pitfalls and protecting your interests. It also fosters trust and transparency, showcasing your commitment to a fair and secure online environment. In a litigious world, a well-thought-out Terms and Conditions page is a wise investment for any website owner, regardless of their site’s size or purpose.
Create A Terms and Conditions Page For Your Investment Dominator Website In Just Two Easy Steps…
STEP 1: Create A Custom Website Page
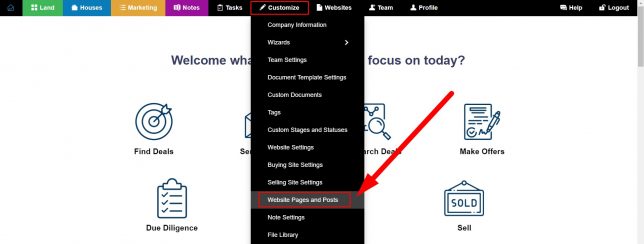
From your Investment Dominator Admin Console navigate to ‘Customize> Website Pages and Posts‘:
Click the blue ‘Add Page‘ button:

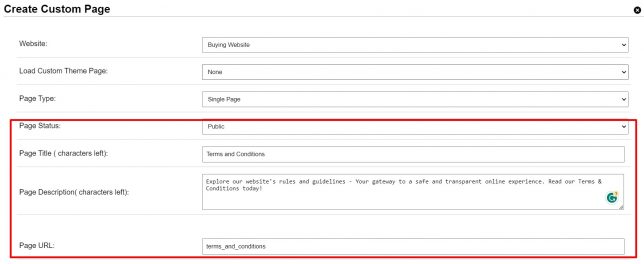
From the ‘Website‘ dropdown, select the desired website to which you would like to add the new page:

Since we want this page to be public on our website, select the ‘Public‘ option under the ‘Page Status‘ field.
Then under the ‘Page Title‘ field enter in a name for your page.
Under the ‘Page Description‘ area, enter a short description for the page.
The system will generate a Page URL automatically however, you can change this under the ‘Page URL‘ field if you would like to customize the final URL.
Here’s an example of how it should look at this point:
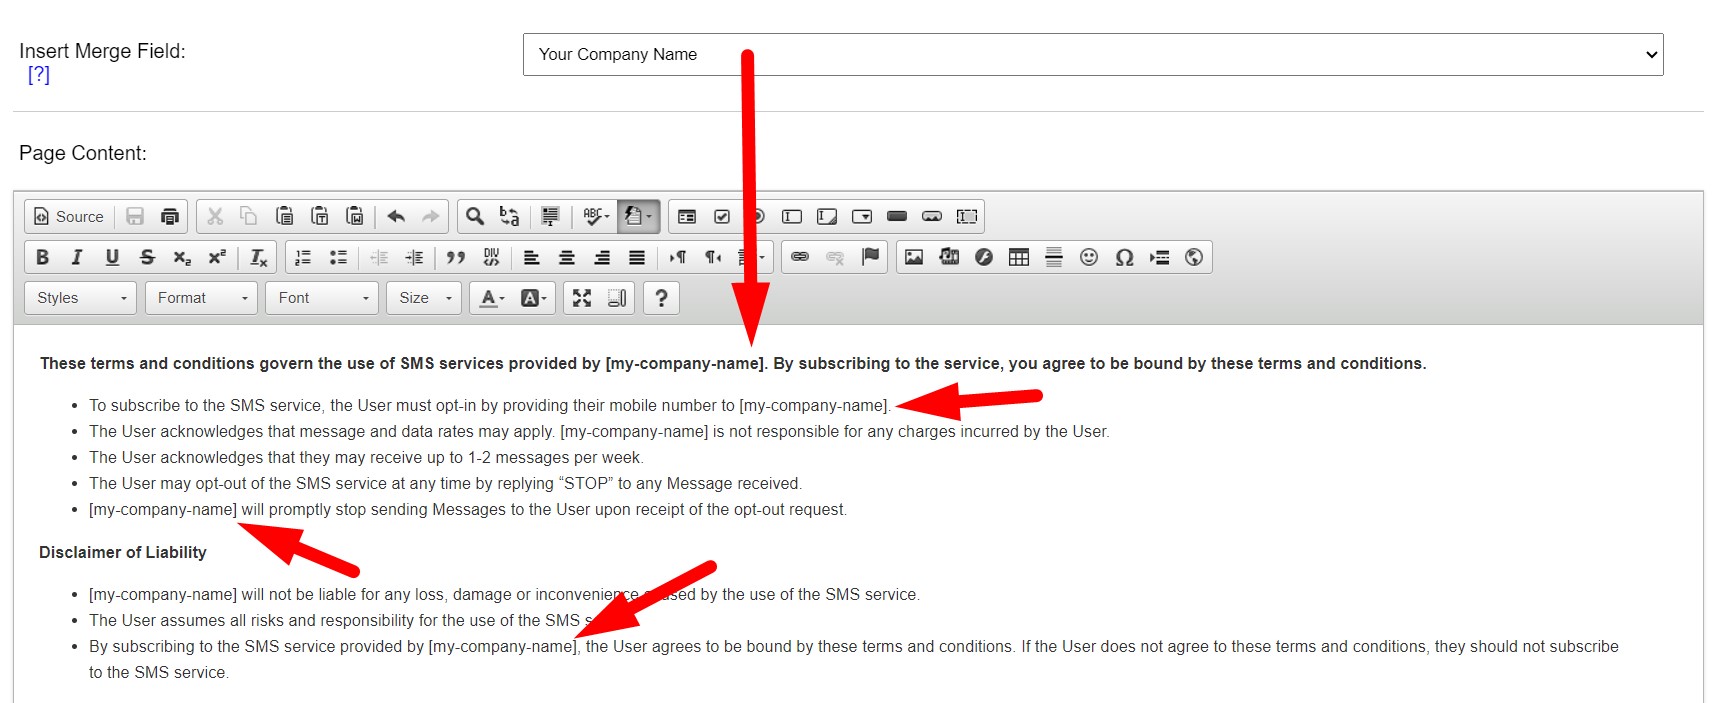
Under the ‘Page Content‘ area enter your page content which can include rich text and images. You can even use system merge fields to dynamically pull in content like your company name. For example:
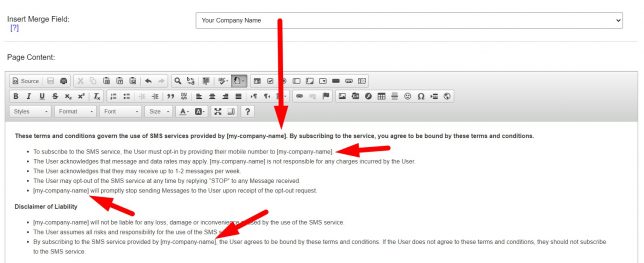
Here is the ‘Source‘ for a generic Terms of Service page, that you can copy and paste and use as a base for your own Terms and Conditions page:
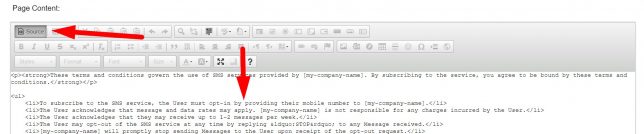
Sample Source:
<p><strong>These terms and conditions govern the use of SMS services provided by [my-company-name]. By subscribing to the service, you agree to be bound by these terms and conditions.</strong></p>
<ul>
<li>To subscribe to the SMS service, the User must opt-in by providing their mobile number to [my-company-name].</li>
<li>The User acknowledges that message and data rates may apply. [my-company-name] is not responsible for any charges incurred by the User.</li>
<li>The User acknowledges that they may receive up to 1-2 messages per week.</li>
<li>The User may opt-out of the SMS service at any time by replying “STOP” to any Message received.</li>
<li>[my-company-name] will promptly stop sending Messages to the User upon receipt of the opt-out request.</li>
</ul>
<p><strong>Disclaimer of Liability</strong></p>
<ul>
<li>[my-company-name] will not be liable for any loss, damage or inconvenience caused by the use of the SMS service.</li>
<li>The User assumes all risks and responsibility for the use of the SMS service.</li>
<li>By subscribing to the SMS service provided by [my-company-name], the User agrees to be bound by these terms and conditions. If the User does not agree to these terms and conditions, they should not subscribe to the SMS service.</li>
</ul>
Disclaimer: Please be advised to have any and all samples reviewed by an attorney for their validity and feasibility for use in any state. No guarantees of any form are being made by us that these samples are valid in the state intended by the user of this material.
Once you have finished with your new page, click the blue ‘Save‘ button at the bottom of the page.
STEP 2: Add The New Custom Page To Your Website Navigation
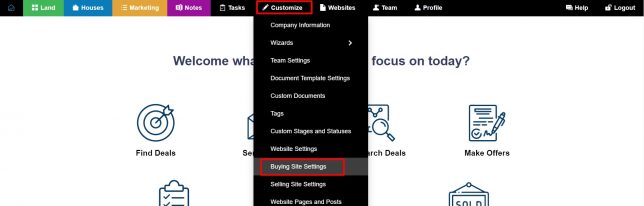
In step 1 you created a new custom page and now it’s time to make this accessible for your users. To do this navigate to the ‘Customize> Website Settings – Buying‘ section of your Admin Console:
Click the ‘Manage Buying Site Menu‘ button:

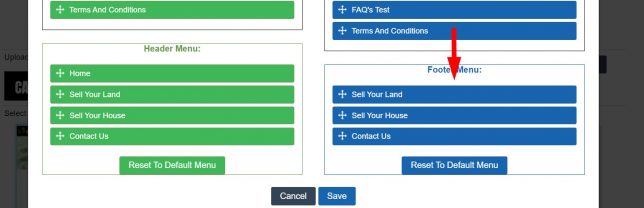
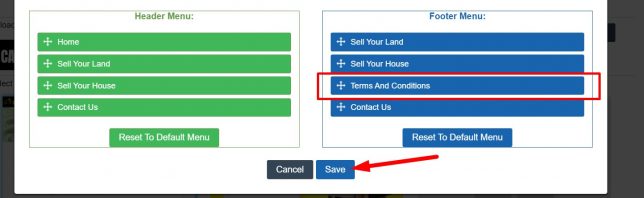
In this example, we are going to add the new terms and conditions page to our Buying Website’s Footer Menu. To do this, find your custom Terms And Conditions page that you created in STEP 1 from the list of pages on the right side of your screen and drag it to the ‘Footer Menu‘ area:
Then click the ‘Save‘ button to publish the change:
To see this new page on your website navigate to ‘Websites> Buying Site‘ from your admin console:

Since we added the new page to our website footer in this example, scroll down to the bottom of your website to see the link to your new page live:
