In the digital age having a Privacy Policy page is an essential component of a website. A Privacy Policy safeguards user data and underscores a commitment to privacy, while a Terms and Conditions page sets clear rules and responsibilities, enhancing online credibility and protecting legal interests. In a world marked by privacy concerns and legal complexities, these pages are indispensable for the Investment Dominator user.
Create A Privacy Policy Page For Your Investment Dominator Website In Just Two Easy Steps…
STEP 1: Create A Custom Website Page
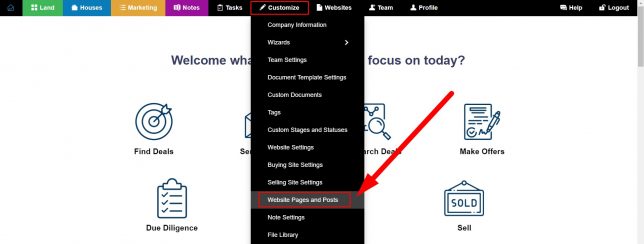
From your Investment Dominator Admin Console navigate to ‘Customize> Website Pages and Posts‘:
Click the blue ‘Add Page‘ button:

From the ‘Website‘ dropdown, select the desired website to which you would like to add the new page:

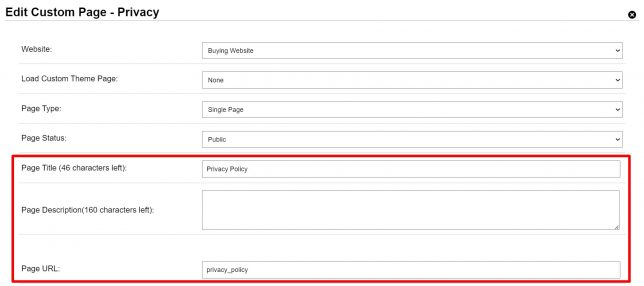
Since we want this page to be public on our website, select the ‘Public‘ option under the ‘Page Status‘ field.
Then under the ‘Page Title‘ field enter in a name for your page.
Under the ‘Page Description‘ area, enter a short description for the page.
The system will generate a Page URL automatically however, you can change this under the ‘Page URL‘ field if you would like to customize the final URL.
Here’s an example of how it should look at this point:
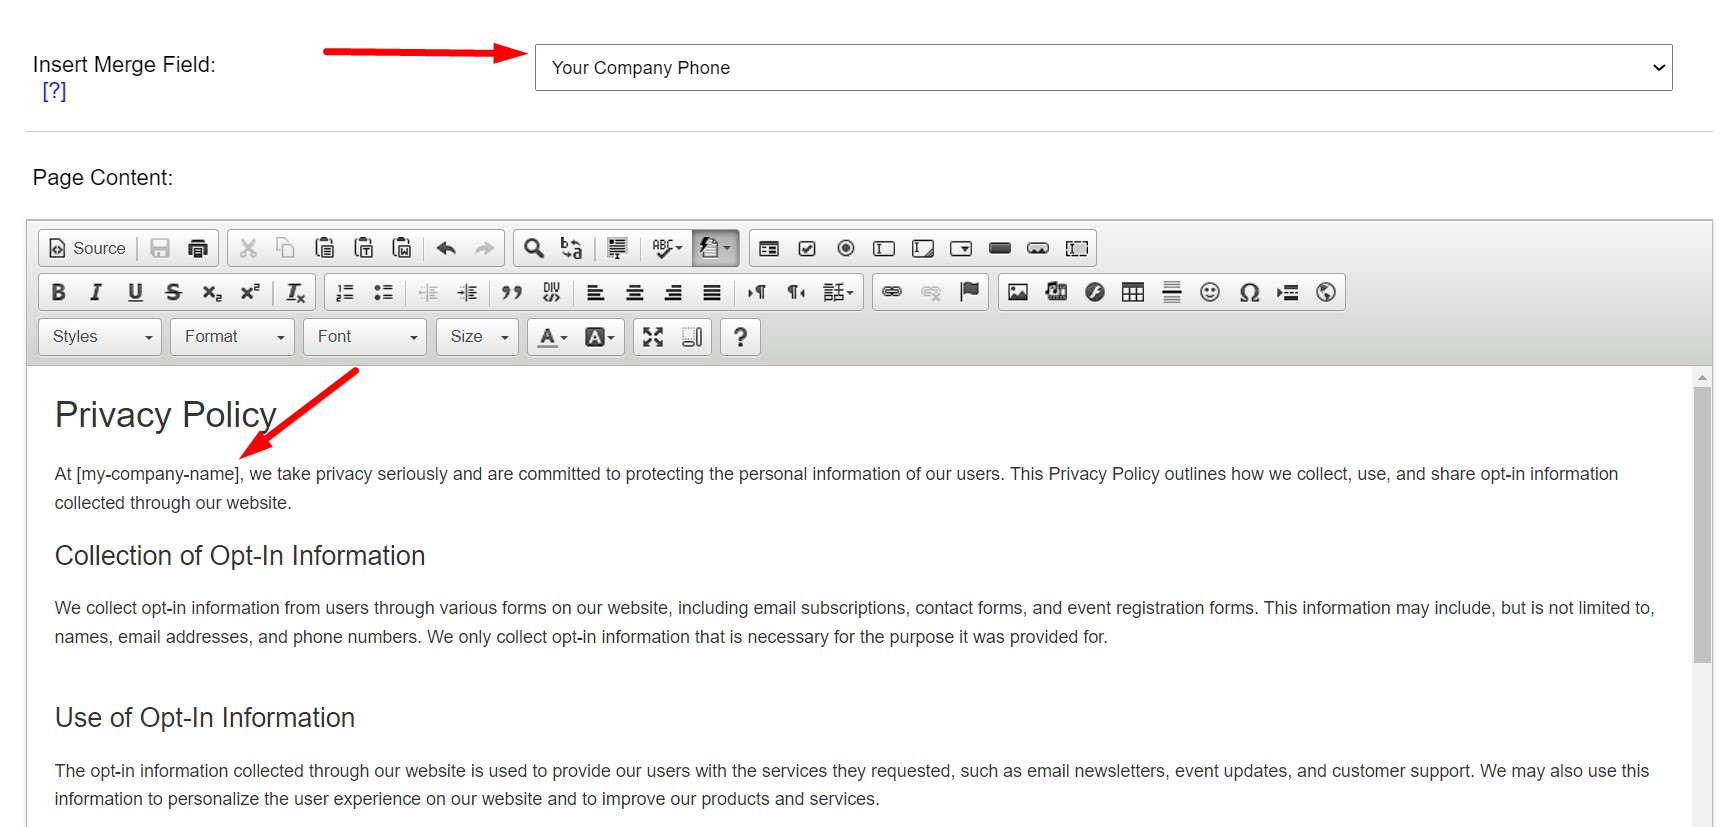
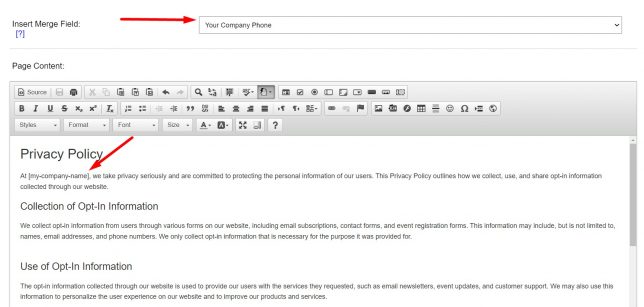
Under the ‘Page Content‘ area enter your page content which can include rich text and images. You can even use system merge fields to dynamically pull in content like your company name. For example:
Here is the ‘Source‘ for a generic Terms of Service page, that you can copy and paste and use as a base for your own Terms and Conditions page:
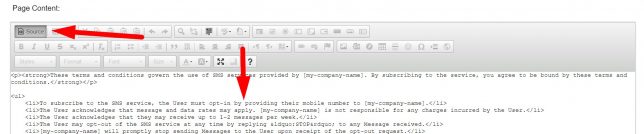
Sample Source:
<h1>Privacy Policy</h1>
<p>At [my-company-name], we take privacy seriously and are committed to protecting the personal information of our users. This Privacy Policy outlines how we collect, use, and share opt-in information collected through our website.</p>
<h3>Collection of Opt-In Information</h3>
<p>We collect opt-in information from users through various forms on our website, including email subscriptions, contact forms, and event registration forms. This information may include, but is not limited to, names, email addresses, and phone numbers. We only collect opt-in information that is necessary for the purpose it was provided for.<br />
</p>
<h3>Use of Opt-In Information</h3>
<p>The opt-in information collected through our website is used to provide our users with the services they requested, such as email newsletters, event updates, and customer support. We may also use this information to personalize the user experience on our website and to improve our products and services.</p>
<h3>Sharing of Opt-In Information</h3>
<p>We do not sell, rent, or otherwise share opt-in information with third parties unless we have the user’s explicit consent or are required to do so by law.</p>
<h3>Data Security</h3>
<p>We take appropriate technical and organizational measures to secure the opt-in information collected through our website from unauthorized access, use, disclosure, or destruction.</p>
<h3>Changes to This Privacy Policy</h3>
<p>We may modify this Privacy Policy from time to time to reflect changes in our privacy practices. If we make any changes, we will update this Privacy Policy and post the revised version on our website.<br />
Contact Information</p>
<p>If you have any questions or concerns about our privacy practices or this Privacy Policy, please contact us at [my-company-phone].</p>
Disclaimer: Please be advised to have any and all samples reviewed by an attorney for their validity and feasibility for use in any state. No guarantees of any form are being made by us that these samples are valid in the state intended by the user of this material.
Once you have finished with your new page, click the blue ‘Save‘ button at the bottom of the page.
STEP 2: Add The New Custom Page To Your Website Navigation
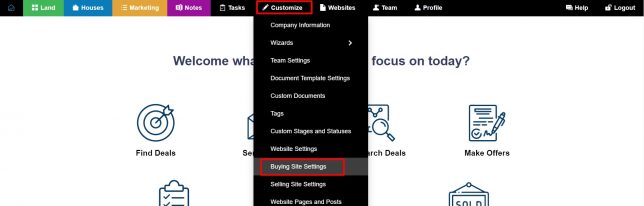
In step 1 you created a new custom page and now it’s time to make this accessible for your users. To do this navigate to the ‘Customize> Website Settings – Buying‘ section of your Admin Console:
Click the ‘Manage Buying Site Menu‘ button:

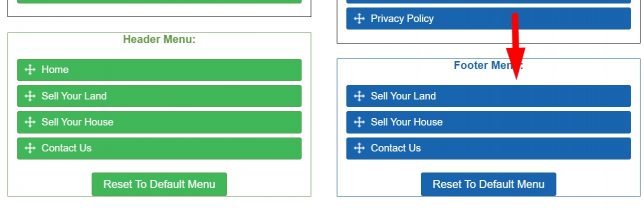
In this example, we are going to add the new terms and conditions page to our Buying Website’s Footer Menu. To do this, find your custom Terms And Conditions page that you created in STEP 1 from the list of pages on the right side of your screen and drag it to the ‘Footer Menu‘ area:
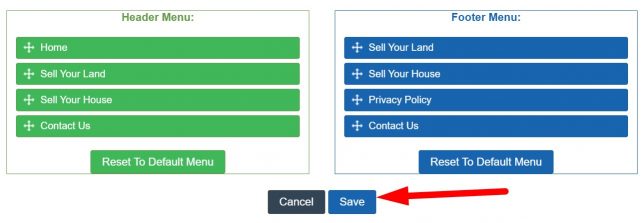
Then click the ‘Save‘ button to publish the change:
To see this new page on your website navigate to ‘Websites> Buying Site‘ from your admin console:

Since we added the new page to our website footer in this example, scroll down to the bottom of your website to see the link to your new page live:
