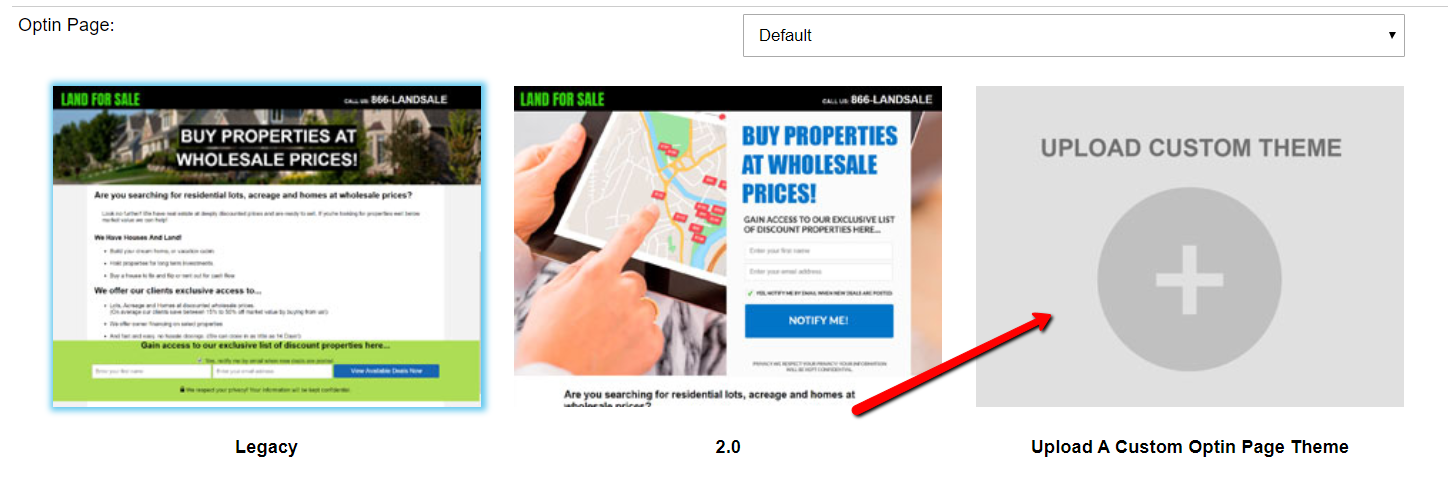
In addition to the two built-in Selling Site themes (Legacy and 2.0) that come with the Investment Dominator system, you can design and develop your own custom themes and even share those themes with other users.
To create a custom theme you need to know a little about HTML and CSS. If you are not familiar with what that is, you can hire a front-end HTML and CSS developer on sites like Fiverr.com or Upwork.com that can take a visual design that you have in mind and code it using those web languages.
Ok, Let’s Get Started
- Download this Sample Selling Site Theme template which contains all of the built-in merge fields to call in things like the Optin Form that we use in our default themes.
You can use these merge fields to pull in information or functions used in the Investment Dominator.
Sample Selling Site Themes:
2. Use basic HTML and CSS to design your layout, then reference the merge fields as needed within your page structure.
Your theme should include the following files (required):
- header.html
- img/
- src/
- footer.html
- index.html
- listings.html
- preview.jpg
- optin-page.html
Common files and directories include (optional):
- contact-us.html
- thank-you.html
- contact-thank-you.html
- deals.html
- styles.css
- script.js
NOTE: You can define a Custom Page Theme within your Custom Theme files by using the [custom_page_template name=”Custom Page”] merge field.
It is best practice to include all website elements and resources within your theme folder so that it is a self-contained directory with no external references.
Paths should be relative to the theme path which can be referenced via the below merge field:
[selling-theme-path]
For example, you can reference a custom scripts.js file by placing the following code into your header.html file.
<script src="[selling-theme-path]/src/scripts.js"></script>Another example would be if you would like to display an image that has been uploaded as part of your custom theme you would use something like this:
<img class="my-custom-class" src="[selling-theme-path]/img/my-custom-image.png" alt="Image description">3. Compress your theme files into a .zip file (that does not exceed 15MB) then upload that file under ‘Customize> Website Settings – Selling> Optin Page‘ and click the ‘UPLOAD CUSTOM THEME‘ option.

After the custom theme is uploaded to the system, it will appear below the built-in theme options like this:
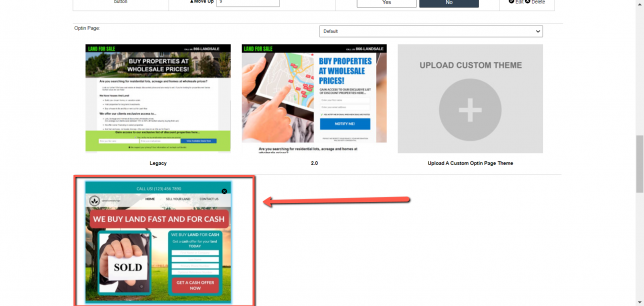
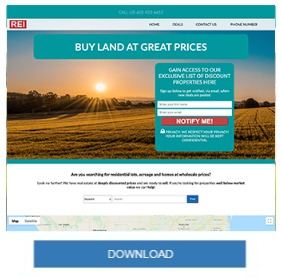
NOTE: The filename of the .zip file you upload will be the name of the theme when it is uploaded and a screenshot of the theme is automatically generated based on your index.html file. So for example, if you name your custom theme file My-Custom-Selling-Site.zip then when you upload this to your system, the system will display the new theme option as “My Custom Selling Site“.
4. Click the custom theme to highlight and select it, then click the blue ‘Update Site‘ button at the bottom of the page to save the change.
Selling Site Merge Fields
1. [selling-theme-path]Returns the path to your custom theme. This is used to set an URL for a specific file (.html .js .img etc)
Examples:
<script src="[selling-theme-path]/src/jquery.min.js"></script>
<link rel="stylesheet" href="[selling-theme-path]/src/styles.css"/>
<a href="[selling-site-custom-theme-path]/../../../real-estate-for-sale.php"><img src="[selling-site-custom-theme-path]/img/logo.png" alt="Buy Property At Discount Prices!"></a>
2. [selling-site-menu]3. [selling-title]4. [selling-logo]5. [selling-description]6. [selling-banner-text]7. [selling-banner-image]8. [selling-banner]9. [optin-form button_text='CUSTOM BUTTON TEXT' confirmation_url='/thank-you.html' input_fields='c_fname, c_lname, c_email, c_phone, c_zip']This will return the Optin Form as HTML with the following parameters
button_text='CUSTOM BUTTON TEXT' This is required and also this image here is the text shown in the confirmation button:

confirmation_url='[selling-theme-path]/thank-you']/thank-you'This is the URL you will be redirected to after clicking on the confirmation button. Usually, it is a thank you page. Note that you need to use the [selling-theme-path] merge field to set the URL.
input_fields=', c_fname, c_lname, c_email' This is optional
Email and First Name are included by default. These are the fields you want to include on the form. Here is a list of the available fields:
“c_email”=>”Email”,
“c_fname”=>”First Name”,
“c_lname”=>”Last Name”,
“c_company”=>”Company”,
“c_phone”=>”Phone”,
“c_cell”=>”Cell”,
“c_address”=>”Address”,
“c_address2″=>”Address2”,
“c_city”=>”City”,
“c_state”=>”State”,
“c_zip”=>”Zip”,
Example:
[optin-form button_text='SIGN UP' input_fields=', c_phone' confirmation_url='[selling-theme-path]/thank-you']
10. [optin-page-text]11. [current-date]12 [popup]PUT YOUR POPUP CONTENT HERE – (DO NOT USE MERGE POST DATA)[/popup]13. [my-company-agent-firstname]14. [my-company-agent-lastname]15. [my-company-agent-phone]16. [my-company-name]17. [my-company-phone]18. [my-company-email]19. [my-company-address]20. [my-company-city]21. [my-company-state]22. [my-company-zip]23. [my-company-site]24. [my-letter-ps-line]25. [my-firstname]26. [my-lastname]27. [my-email]28. [my-signature]29. [my-agency-disclosure]30. [company-fax]31. [selling-site-footer]32. [optin-page-form-custom]33. [selling-site-menu-json]This returns a javascript variable with the menu as a JSON array. Here is an example of the return:
var json_menu = [{"name":"Property Listing","href":"listings.php","active":false},{"name":"property details","href":"property_details","active":false},{"name":"Listing","href":"listing","active":false},{"name":"Phone Number","href":"","active":false}];
34. [selling-theme-path]35. [property-search]36. [property-listing-map]37. [page-title]38. [current-date]39. [custom_page_template name="Custom Page"]40. [property-listing-elements order =’1′]41. [blog_posts_json page_id=’36’ page=’1′ limit=’10’]page_id='36'This is required. the page_id includes all the posts you want to display. You are able to get this ID by going to Customize-> Websites Pages and Posts.

Note that the custom page should be set to Page type = Blog Page as shown here:

page='1' limit='10'This is required the limit will define the number of blog posts per page you want to show. The page defines the default page. An Example of what is returned is this:
var blog_posts_json = [{"w_id":"36","w_type":"SinglePost","w_status":"Public","w_add_to_page":",35,","w_title":"Property","w_content":"<p>[post-featured-image]<\/p>\n\n<p>Lorem ipsum dolor sit amet, consectetur adipiscing elit, sed do eiusmod tempor incididunt ut labore et dolore magna aliqua. Ut enim ad minim veniam, quis nostrud exercitation ullamco laboris nisi ut aliquip ex ea commodo consequat.<\/p>\n","w_menu":"","w_content_type":"OwnerLand","w_content_status":",1,","w_tracking":"","w_logo":"","w_banner":"","w_banner_text":"","w_created":"1507929593","w_updated":"1638989492","w_description":"Lorem ipsum dolor sit amet, consectetur adipiscing elit, sed do eiusmod tempor incididunt ut labore et dolore magna aliqua. Ut enim ad minim veniam, quis nostrud exercitation ullamco laboris nisi ut aliquip ex ea commodo consequat.","w_theme":"","w_html_file":"","w_featured_image":"sold_1637780867.jpg","m_url":""},{"w_id":"76","w_type":"SinglePost","w_status":"Public","w_add_to_page":",35,49,","w_title":"Testimonial 1 ","w_content":"<p>“This is the testimonial” ~ Alex<\/p>\r\n","w_menu":"","w_content_type":"Contact","w_content_status":",,","w_tracking":"","w_logo":"","w_banner":"","w_banner_text":"","w_created":"1617989585","w_updated":"1645222592","w_description":"","w_theme":"","w_html_file":"","w_featured_image":"","m_url":"testimonials"}];42. [property_listings_json status_id=’11’ page=’1′ limit=’10’]This returns a javascript variable with the property listings under the status set on the status_id parameters. It uses the following parameters:
status_id='11'This is required it defines the status of the properties you want to get. Use 11 for selling and 15 for SOLD. You can also leave both empty.
page='1' limit='10' This is required it will allow you to define the number of properties per page you want to show. Page defines the default page.
var property_listings_json = This will return JSON like this :
[{"p_id":"70523","or_id":"63960","u_id":"1","c_id":"","p_type":"Land","p_status":"11","p_state":"AZ","p_county":"Yavapai","p_apn":"402-13-051Q","p_price":"0","p_price_option":"0","p_acres":"0","p_sqft":"10","p_liens":"0","p_backtaxes":"0","p_improvements":43. [property-listing-elements] This returns a specific listing element on HTML it will use the following parameters:
order='1' This is the order number of the listing element you can get this number under Website Settings -> Selling -> Property Listing Elements
